Specifications
Vehicle
- 1995 Jeep Wrangler YJ
- Sahara Edition with Air Conditioning
- Engine: 4.0L I6 MPI AMC 242 “Power Tech HO” (High Output)
- Horsepower: 190 hp @ 4750 rpm
- Torque: 220 ft lb @ 4,000 rpm
- Manual Transmission: AX-15 5-Speed
- Transfer Case: NP231 – “Command-Trac”
- Front Axle: Dana 30
- Rear Axle: Dana 35 C-Clip
- Bolt Pattern: 5 x 4.5
- Length x Width: 151.9″ x 66″
Accessories
- [Winch Plate] Ramsey 251128
- [Light Bar] Custom Fabrication by Obsession Offroad
- [Tow Eyes] Custom Fabrication Replicas
- [Winch] Ramsey 111090 REP 9.5e (Ramsey REP 6000 Substitution)
- [Front Fogs] Delta Lights (01-6139-50BX) Thinline 100 (Mopar 56002784 Substitution)
- [Front Fog Brackets] Mopar and Custom Fabrication (Mopar 56002290 Substitution)
- [Bumper End Caps] Crown Automotive (Mopar 52040027AB Substitution)
- [Rear Fogs] KC HiLites 1532 57 Series (KC HiLights LE Series #570 Substitution)
- [Soft Top] Bestop 79120-37 Sailcloth Replace-A-Top with Clear Upper Door Skins (Mopar 4778476 Substitution)
- [Soft Top Hardware] Bestop 55004-01 Factory Style Hardware Bow Kit (Mopar Soft Top for YJ Half Door Spice Substitution)
- [Sport Bar Covers] Bestop 80009-37 Spice Sport Bar Cover
- [Decals/Stencils] No Limit Customs
- [Antenna] Hustler IC56 102″ Whip Antenna
- [Antenna Mount] ProComm JBC986
- [Antenna Tie-Down] Kalibur-K101X
- [JP17 Plate] Celebrity Machines
- [JP017 Vehicle Pass] Retrocollection
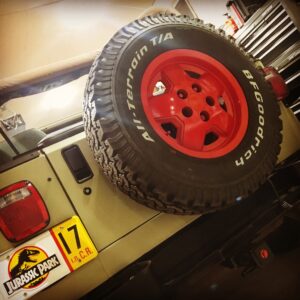
- [Tires] (4) of 30×9.50R15 BF Goodrich All Terrain T/A KO2
- [Spare] (1) of 30×9.50R15 BF Goodrich All Terrain T/A KO
- [Spare Lock Nut] Mopar 52088515
- [Tow Receiver] CURT 13657 Class III Receiver
- [Entry Guards] Smittybilt 7616
- [Front Shackles] 5/8″ Shackles (2)
- [Door Pouches] ProjectVIC Replicas
Audio
- [Soundbar] Vertically Driven 792501 6 Speaker Black (Mopar 82203031 Substitution)
- [Stereo] Pioneer MVH-X390BT Bluetooth Stereo
- [Front Speakers] Infinity (Unknown Model via PO)
- [Stereo Harness] Metra 70-1002
- [Speaker Harness] Metra 72-1002
- [Soundbar Harness] Custom 6-Pin Waterproof Connector
Paint
- [Ext. Beige] Limco MM217.40 Basecoat (LJ1 Sand Beige Metallic Poly Substitution) – 1 Gal
- [Ext. Red] Limco M6564A Basecoat (M6564 Ford Performance Red) – 1 Quart
- Limco LR12 Reducer – 1 Gal
- Limco LVC10 Clearcoat – 1 Gal
- Limco LVH10F Hardener – 1 Quart
- Limco LF10 Flattener – 1 Quart
- Evercoat Dura Build Acrylic Primer Surfacer – 1 Quart
- U-Pol Dolphin 2K Polyester Body Filler
- [Rear Fogs] Krylon Stained Glass
- [Int. Door Panels / Center Console] Rust-Oleum 2X Satin Hunt Club Green
- [Int. Dash / Sun Visors] Dupli-Color Vinyl And Fabric Coating (HVP111 Charcoal Grey)
- [Interior Tub] U-POL Raptor Liner + TBD SBP Tint
- [Frame] POR 15 Semi Gloss Black + TBD Top Coat
- [Misc. Black Trim Accents] Rust-Oleum Semi-Gloss Black
Paint Sequence
- Sand dents and surface rust areas to bare metal
- Body filler
- Sand everything
- Etching primer on bare metal
- Primer surfacer coat
- Beige base coat
- Tape off stripes and red base coat
- Clear coat
- Sand, particularly stripe edges
- Re-clear coat
Planned Aftermarket Accessories
- [Carpeting] Cutpile 7980 Dark Green
Lighting
- Lighting [Headlamp] (2) of H6054 (OE)
- [Parking] (2) of 3157 Bulb
- [Front Fog] (2) of H3 Halogen
- [Front Side Turn Signal] (2) of 194 Bulb
- [Brake] (2) of 1157 LED
- [Third Brake] Removed
- [Reverse] (2) of 1157 LED
- [Rear Fog] (2) of H3 LED
- [Dash] (X) of 194 LED
- [Footwell/Courtesy] 1156 LED
- [Dome] (2) of 194 LED
Paint
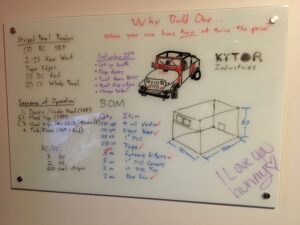
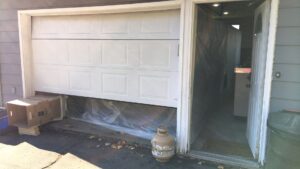
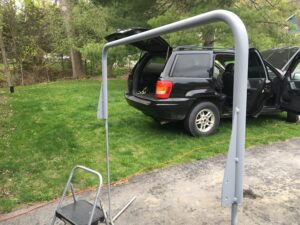
Building the Paint Booth
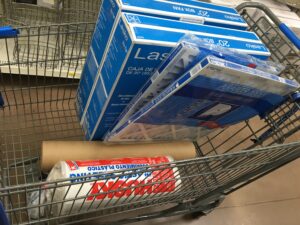
First up, the paint booth has to be constructed. I built this in my one-car garage using PVC pipe and plastic sheeting. In retrospect, I will never attempt this again until I have a larger garage. It locked me out of doing anything non-painting related for weeks.


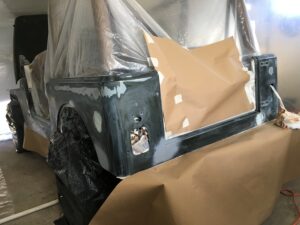
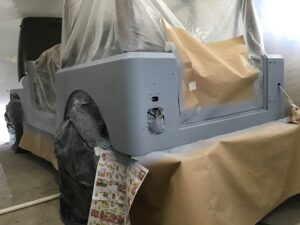
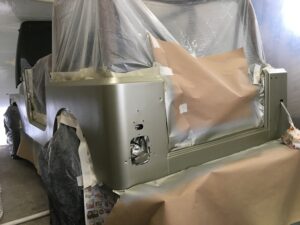
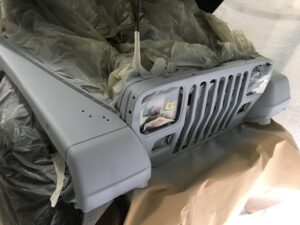
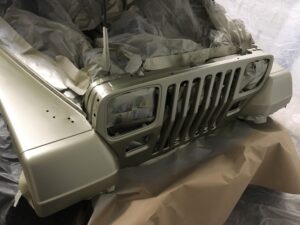
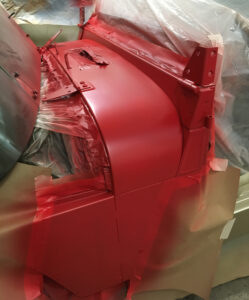
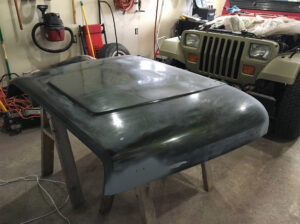
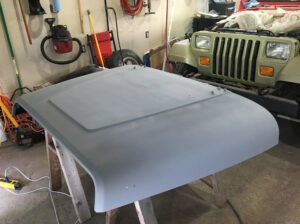
Prep and Basecoat
After extensive prep work that simply cannot be captured in photos, the tub was ready for paint. This included repairing minor dings and dents with body filler, surface corrosion/rust, removing stickers and mystery residue, etc. With heaters firing, I warmed up the makeshift paint booth and shot the primer. The shop recommended Evercoat Dura Build primer, which worked great to build up a layer and sands extremely easily. The primer was sanded to a smooth finish and shot with basecoat Sand Beige Poly.


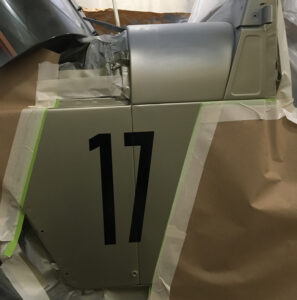
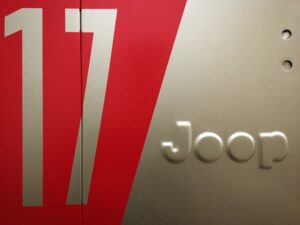
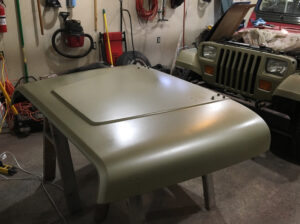
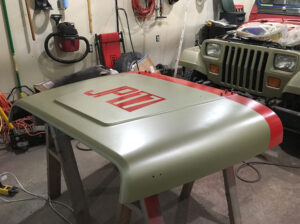
Stripes and Decal
Now that the SBP basecoat was down, I had to wait long enough to tape off the lines, but not so long that the clearcoat would cause a problem. This was challenging because it gave me a much shorter window (roughly 4-24 hours) to work in. I had to make sure I had the time blocked off, because unlike nearly every other step of the project, I couldn’t simply put it on hold and come back to it at a later time.
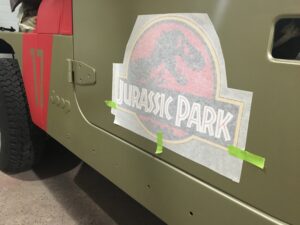
I did come across an issue with the popular dimensional graphic that’s floating around the internet, namely the rear stripe dimensions are incorrect. Following the proper angle (72.5 deg) from the rear edge of the middle flair leads me to 1.5″ forward from the graphic shown. In order to use these measurements, the angle would end up being approximately 70 degrees. However, 70 degrees is not correct because going by movie reference documentation the front is clearly 72.5 degrees. Unfortunately a number of JP Jeeps out there use these incorrect measurements, and you can tell the rear stripe is not properly parallel. I quadruple verified by measurements and angles of each stripe. Here are the corrected dimensions.
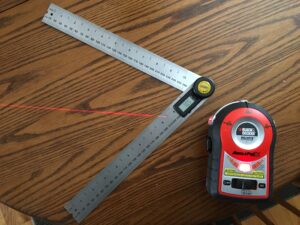
Using a Laser Line Projector paired with a 10″ Digital Angle Finder I was able to easily make precision tape lines for the tub stripes.
Unfortunately I hit an issue. My compressed air drying system failed and parts of the second coat of clear became very cloudy after drying due to moisture. The paint shop had run out of stock on materials, so the paint booth had to stay up for another two weeks. Once the materials came in, I lightly sanded and re-cleared the tub, thankfully I did not need to completely take off the clear, which would have also required new basecoat, to fix the issue.


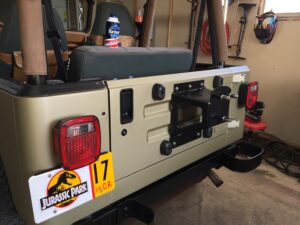
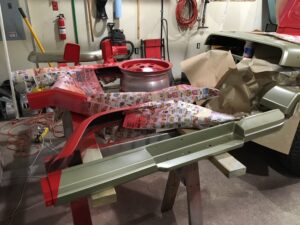
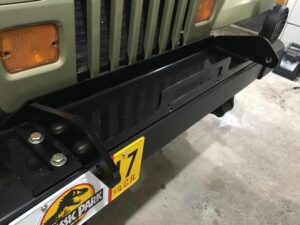
Accessory Restoration
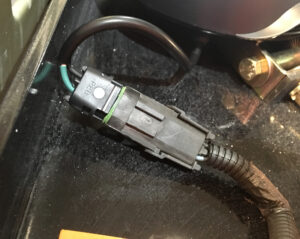
A restoration was completed on the fuel neck cover, the license plate bracket, tail lights, tailgate latch, bumper and bumperettes, and spare wheel bracket. All mild steel hardware was painted semi-gloss black, and the spare wheel bracket hardware was replaced with stainless steel. One of the spare lug nuts was replaced with a unique key anti-theft nut. I also chopped the third light wire and installed a waterproof 4-pin plug. If the state inspection gives me any grief about not having a third brake light I can easily pop it on and plug it in within a few seconds.
Earlier on when removing the above door sport bars, I found out the driver’s side bar’s rear bolt was completely sheared. It took some work with left hand drill bits, but after slowly stepping up from pilot to 1/4″ it finally broke free. Removed the passenger side and noticed the threads were all buggered up. I retapped both roll bars and replaced the hardware with new Grade 8 bolts. The bars were repainted and brand new spice covers installed.


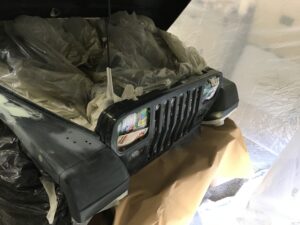
Painting the Hood
The angle sweeping from the sides of the hood to the front of the hinge is tricky, however having the laser line made it very easy to put down straight.


Mirrors, Flares and Wheels
The body accessories went under the gun. Breaking all of these out into numerous steps is a painful reminder of how much easier this is in a real paint booth.


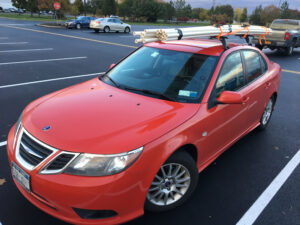
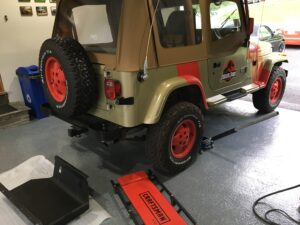
First Drive
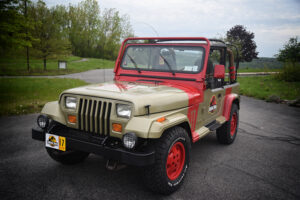
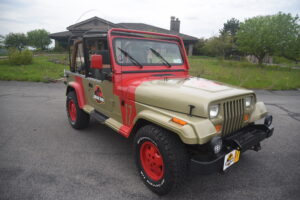
April 30th 2017, JP17 officially hits the road for the first time!

Final Touches
Some remaining accessories are painted and installed.


Accessory Installation
I’m a details person, every single nut and bolt matters. I ordered new high quality nylon door stopper straps, rubber caps that prevent door straps from coming off, I restored the door strap hooks, retapped the holes I wasn’t happy with, and replaced the door strap hook hardware with tapered head stainless steel bolts. I also restored door handles, new hood tie downs, and a bunch of misc stainless steel hardware.
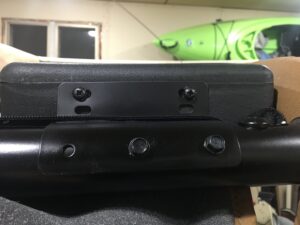
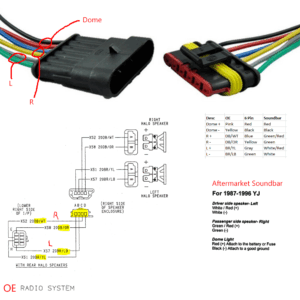
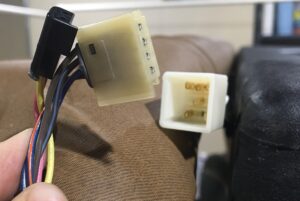
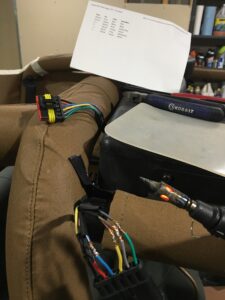
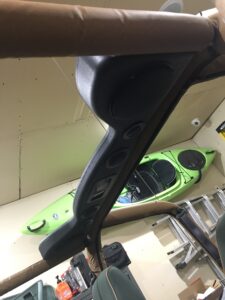
I picked up a sound bar, it’s not OE but I’m okay with that because it has overhead lighting. The bracket holes didn’t line up with sport bar tappings, so new holes and fresh paint solved that. And because everything else was going so smoothly, the wiring harness is also completely different. That’s okay I tracked down the factory wiring diagram for that they call “halo speakers” to rip out both of these garbage molex plugs and solder in proper 6 pin waterproof plugs.


Originally, I used the Delta foglights in the Specification section as a substitution considering how extremely rare OE Mopar Sahara YJ foglights are. Left is Delta, right is OE Mopar. Later, these were replaced with OE Mopar.
")
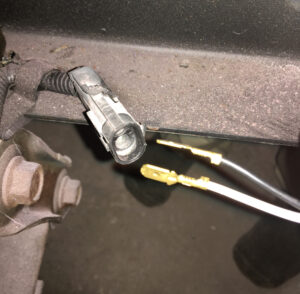
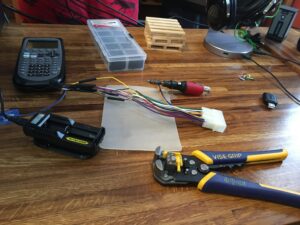
The plug is completely different, and I didn’t want to remove the OE harnesses, so I grabbed some 14-16awg Delphi connectors off eBay to integrate the fog lamps properly. Since I don’t have the “Delphi Tool” I just used standard crimping tools and soldered it for a nice secure connection. It’s absolutely not going anywhere. Being that this is in a high corrosion area, I applied Permatex Dielectic Grease. I’m using this on nearly every electrical connector exposed to weather. We are dealing with 2+ decade old stuff here afterall.
While not screen accurate, I don’t carry around a stack of cassette tapes. So I wired up a Bluetooth stereo. Soldered wires of course, spared no expense. This was later replaced with an OE AM/FM Radio with Bluestoothilizer mod.


Mechanical Maintenance and Repairs
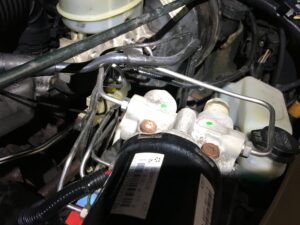
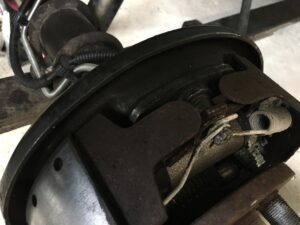
After having a rear brake line rot out in fall 2017, I replaced all of the brake lines with CNC bent stainless steel, plus a stainless steel rear axle brake flex hose; then filled and flushed/bled the system. Also replaced the rear brakes cylinders and hardware with new.


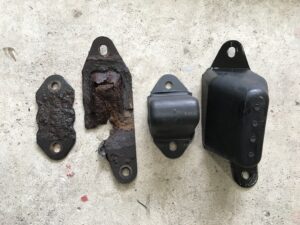
The original factory bump stops were completely rotted or missing, so those were also replaced with new.

The last time the plugs were changed was 65 million years ago, so JP17 got new plugs, distributor rotor/cap and OE replacement plug wires.


The gas tank skid plate has seen better days, and has been replaced by a thicker steel heavy-duty powder coated skid plate.


I’m fairly certain the original 1995 steering stabilizer was still on the Jeep, and this theory was further validated when the tapered bolt was so stuck that it literally went through plastic deformation under a pitman arm puller before it popped loose. I used an angle grinder to chop off the derformed section and replaced it with a Quadratec Hydro 7.0.
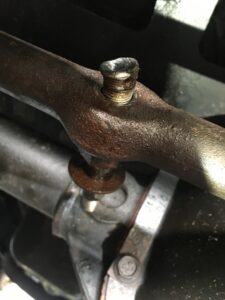
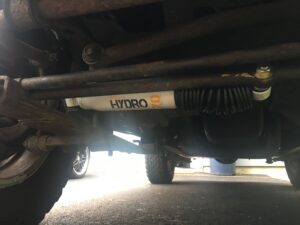


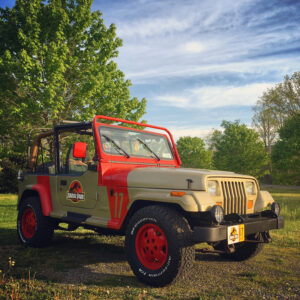
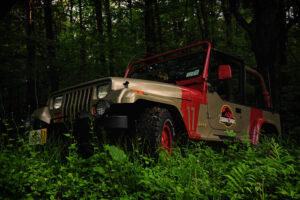
Photo Gallery